Meet the MSI GS66 Stealth Laptop, a Laptop that comes with a 300Hz Display, but unlike some other 300Hz Laptops, this one is actually very portable. It comes with a 15” Display, it’s thin, light and it also comes with pretty much the highest-end specs that you can find on a Laptop.
MSI sent this over, and sponsored this entire video, for us to take a closer look at probably the most powerful portable Laptop that you can buy.
Design
Starting off with the Design, the MSI GS66 Stealth is an absolutely stunning looking Laptop. It’s got this very stealthy Matte Black look, which MSI is calling Core Black. The logo itself is laser etched into the body of the Laptop, so from certain angles it’s not even visible and you just get a slab of black metal. When closed down, the GS66 Stealth is simply just a straight piece of metal. I really love how this Laptop looks, it’s a very anonymous Laptop so to say, it’s definitely deserving of its ‘Stealth’ branding.

At some angles, you can’t see the MSI logo at all.
It’s also surprisingly portable. With a weight of just 2.1kg and a thickness of just 1.9cm, this is really the thinnest and most portable high-end Gaming Laptop that I have personally seen. The whole idea of the GS66 Stealth is that you have a very powerful Laptop when you’re at work, then you just pack it in your bag and take it to your place and use it as a high-end Gaming Laptop there. It’s really the best of both worlds, work and Gaming.
The Port selection is also very generous on this. We have a Thunderbolt 3 Port, which allows you to connect this Laptop to 5K Monitors or even connect an External GPU for even more Performance in case you need it. You get a full sized HDMI 2.0 Port, three USB 3.2 Type A Ports, as well as one USB 3.2 USB C Port and an Ethernet Port as well. The Cooling on this Laptop is very extensive as well. We have Vents on each side, in the Hinge as well as under the Laptop itself. You’ll see why this is important when I get to the Performance section of this video.
Display
Now, the Display. The model we have comes with a 15.6”, 1080p, IPS Display with a 300Hz Refresh Rate. Usually, Laptops have a 60Hz Refresh Rate, meaning that they can display up to 60FPS. Some of the higher-end Gaming Monitors that you can buy have something like a 144Hz Refresh Rate, or 240Hz as a maximum. This one has an insane 300Hz Display, more than on any Desktop Monitor that you can buy as of right now. So, if you’re a competitive Gamer, this Display is going to make a massive difference as you’ll be able to see five times more frames per second, compared to a standard Display.

This model has a 1080p Display, but there is a 4K option.
Now, if you’re not a competitive Gamer, MSI does have a 4K option of this Display. This gives you more sharpness at a more standard 60Hz Refresh Rate. If you’re a Content Creator and not an E-Sports Gamer, I would recommend that version, but if you need an insanely high Refresh Rate, you do have this option on the GS66 Stealth.
When it comes to the quality of the Display Panel itself, it’s a pretty great Panel. The Viewing Angles are great and the colours pop. Unfortunately, there doesn’t seem to be any calibration happening at the factory, at least not for the 1080p Panel. The Bezels are very thin, with the exception of the pretty noticeable chin. I would’ve loved this to be as thin as the other three Bezels, but of course that that would’ve required a 16:10 Aspect Ratio Display, which isn’t really that common on Gaming Laptops.
Something that I really like about this Display is that you can tilt it all the way down and the Hinge itself, just like the entire Laptop, is fully made out of metal, giving the entire Laptop a very premium look and feel.
Keyboard & Trackpad
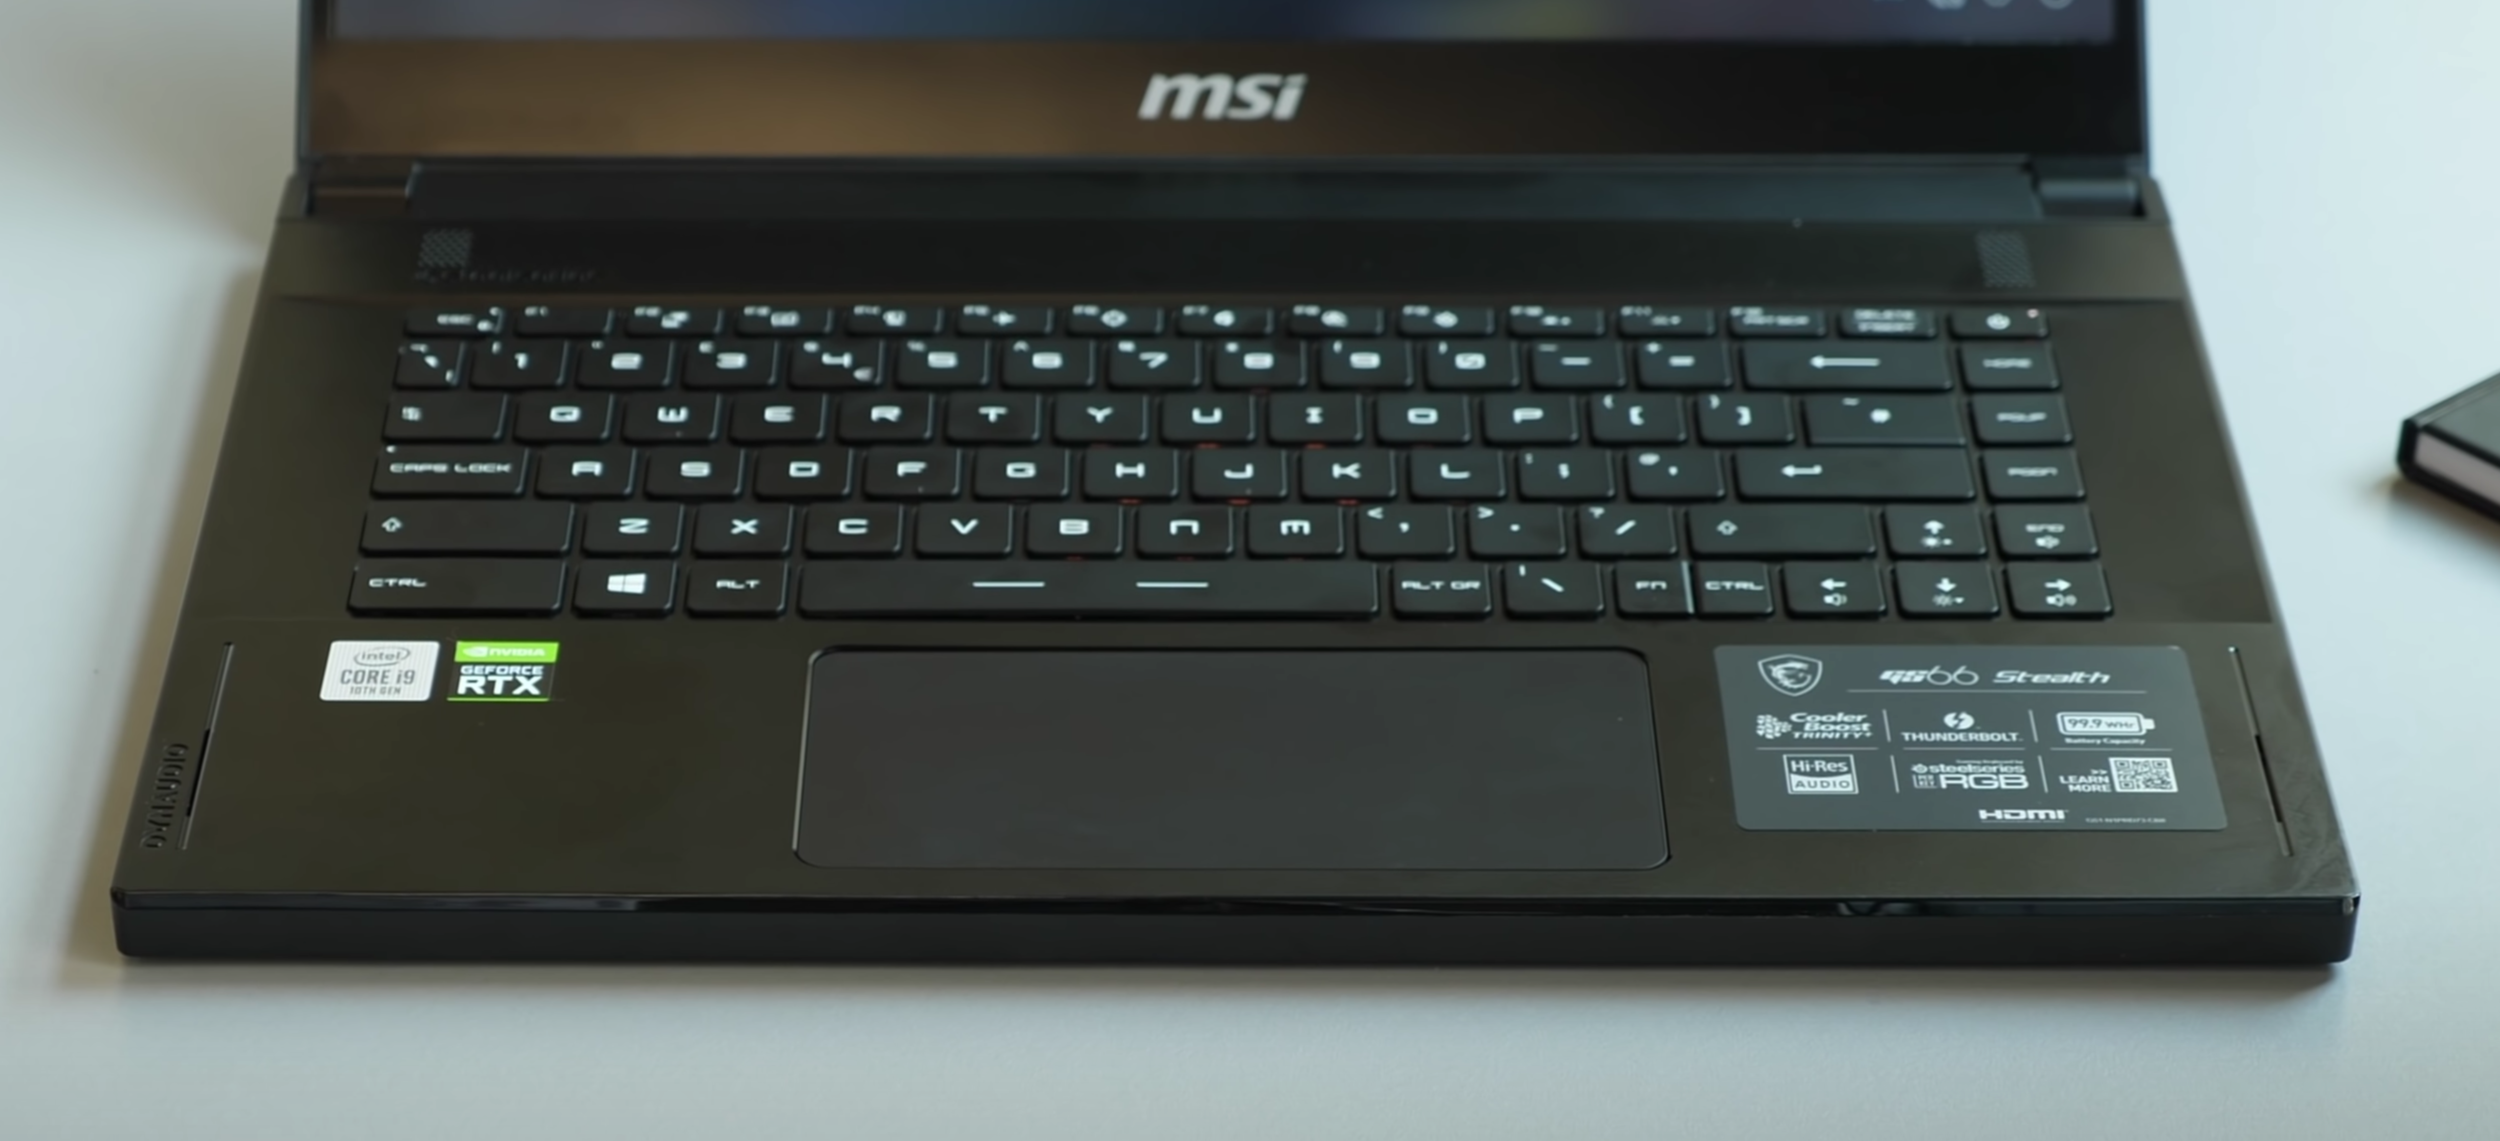
It just wouldn’t be a Gaming Laptop without RGB.
What about the Keyboard and the Trackpad? I’ll start with the Trackpad because this is far simpler. You get a very wide Trackpad with the GS66 and there are no individual Buttons on it, it’s all just a single Button. Just like on most other Windows Laptops, it does indeed use a Diving Board mechanism, which means that it’s fairly easy to press near the Button and then it gets harder, the higher you go. We do have Windows Precision Drivers, so the tracking is really good, I don’t really have anything to complain about here.
Now, when it comes to the Keyboard, we do have a full RGB Keyboard, with each Key being individually back-lit. The Keyboard Backlight is provided by ‘Steel Series’ and there’s a ton of different effects that you can have and tweak, based to your liking. In terms of how it feels, it’s a very rubbery Keyboard so it’s soft to the touch rather than ‘clicky’. So, if you’re into that, you’ll definitely love this Keyboard.
Camera, Microphones & Speakers
Before I talk about the Performance, which is what you’re all probably here for, we did some tests with the Camera, Microphones and Speakers in the video above. If that’s of interest, be sure to give it a watch.
Performance
Right, time for the Performance. CPU-wise, we get the highest-end 10th Generation Intel i9 10980HK Chip, which is Intel’s most powerful Processor for a Laptop. It has eight Cores and can Turbo Boost up to 5.3GHz. As for the GPU, this model right here comes with the NVIDIA RTX 2080 Super Max-Q, with 8GB of GDDR6 Memory. With the RAM, our unit has 16GB of 2666MHz DDR4 Memory, but you can actually configure this to up to 64GB of RAM. Storage-wise, our unit has 1TB of NVMe Flash Storage, with Read Speeds of just over 3GB/s. So, these specs are pretty much the highest that you can get in a Laptop, normally stuff that you see in a large, thick 17” Gaming Laptop. But as you can probably tell, the GS66 is very thin and very portable, considering the specs that it packs.

If you’re looking for a Gaming Laptop, you can’t get much better specs than these.
So, now let’s run some real world tests and see how it performs. In Fortnite, I was playing this game on maxed-out settings and I was getting around 120FPS, which is nuts for a Laptop. But, keep in mind that you do have that insane 300Hz Refresh Rate, so if you drop the settings a bit, you can actually get close to, or even exceed that 300FPS mark and take full advantage of what this Display has to offer.
In Call of Duty Warzone, I was getting around 120FPS. This was on ‘Epic’ settings with everything maxed out, except for Ray-Tracing, which was disabled. In Overwatch, I was getting 160FPS on ‘Epic’ settings and after dropping the settings to Medium, I got to 300FPS. I then decided to cap the Frame-Rate to 60 and, holy smokes, I was shocked to see how laggy 60FPS looked, compared to 300FPS. Next up, I tried Starcraft 2, one of my personal favourites and on the highest possible settings, I was getting between 200-220FPS. It’s unbelievable that we can do all of this on a Laptop that can easily fit in your bag.
Now, with this insane Performance, you can also use this Laptop for actual work. So, I loaded ‘Keyshot’, which is what we use for all the concepts and renders that you see on the channel, and the GS66 rendered our ZONEofTECH benchmark in just 29 seconds. This is using the GPU. For example, rendering the same project at the same exact settings, on the 2019 maxed out iMac that has an Eight-Core i9 9900K Processor, took 5 minutes and 50 seconds. This is why having an RTX Card in your computer makes such a massive difference.
Battery Life

That Thunderbolt Port could come in handy if you’re looking for the best performance on the go.
The MSI GS66 Stealth features a 99WHr Battery, which is the largest Battery that you can legally carry with you on an Plane, so MSI have really gone all the way here. Since we do have a Thunderbolt 3 Port, we can actually charge it via any USB C Charger. In fact, you can even charge this Laptop on the go, via a USB C Power Bank.
According to MSI, you can get up to 9 hours of productivity use out of it. This will of course drop if you’re Gaming or if you’re doing anything intensive. Also, because of how power hungry the NVIDIA GPU and the Eight-Core CPU is, you will need to have this Laptop plugged in if you want to take full advantage of its Performance. Otherwise, on Battery, it will run at about 50% of its full power.
Value
Ok, how much does the GS66 cost and what do you get for that money?
Well, at the moment you can get it for as low as £1,550 and for that price you get a Six-Core, 10th Gen, i7 Processor, 16GB of RAM, a 512GB SSD, an RTX 2060 GPU with 6GB of Video Memory and a 240Hz Refresh Rate. It’s not 300FPS, but it is very close.
That’s the configuration that I would personally recommend. It’s still extremely powerful and with that Thunderbolt 3 Port, you can indeed connect a Desktop Class GPU in case you do need more Performance.